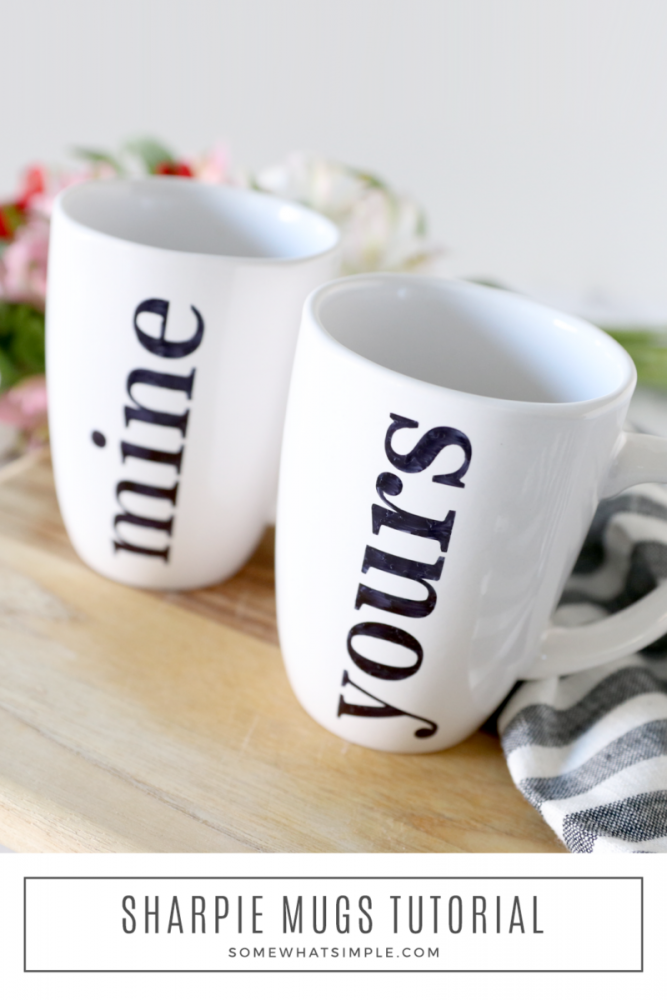
Sharpie Mugs
This post may contain affiliate links. Read our disclosure policy.
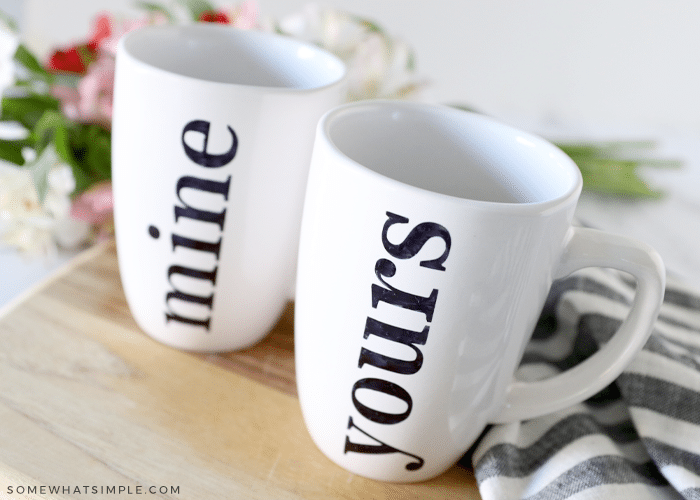
A simple, thoughtful gift idea for under $5, these Sharpie mugs are perfect for any occasion!
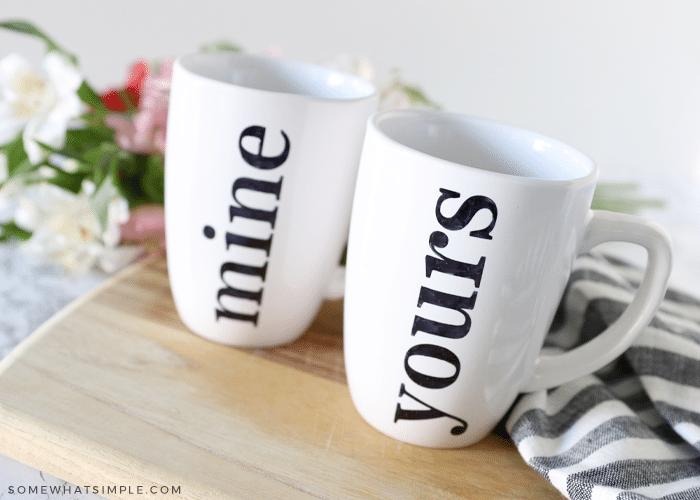
With the holidays fast approaching, my mind is already in over-drive on simple but personalized gifts for friends and family. Today I’m so excited to share with you one of my new favorite gift ideas, Sharpie Mug Art.
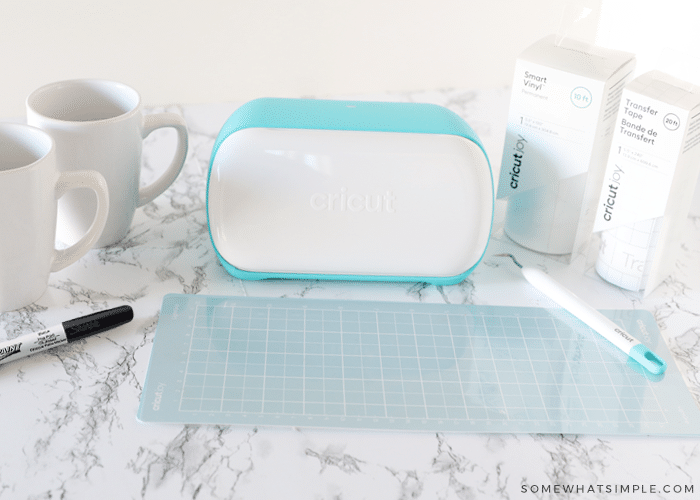
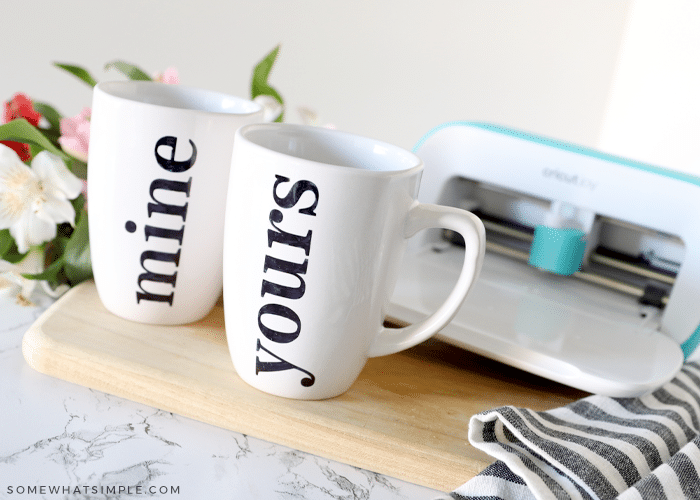
There are many methods to start the design of this project – you can free-hand a design, write out a poem, doodle, etc. For these particular mugs, I used my Cricut Joy and some vinyl to make a stencil.
These lovely little mugs only require a few simple supplies and they can be made in minutes!
How to Make Sharpie Mugs
MATERIALS –
- ceramic mug – I purchased mine at the dollar store
- cotton balls
- rubbing alcohol
- Oil-based Sharpie pen*
- Cricut Joy (or your favorite Cricut cutting machine)
- Design Space
- vinyl – this is a great project to use any scraps you have laying around!
- standard cutting mat
- weeding tool + scissors
- transfer tape, optional
- q-tip or napkin, optional
- baking sheet
- oven
*Regular Sharpie markers will wash off in the dishwasher, so be sure to use the oil-based versions. And feel free to use any colors you’d like, just keep in mind that once the mugs bake in the oven, their colors change and may not be as pretty or vibrant.
DIRECTIONS –
Get it Clean. Clean your mug with a cotton ball and rubbing alcohol to remove any grease and dirt. (The Sharpie will not adhere as well to a dirty mug.)
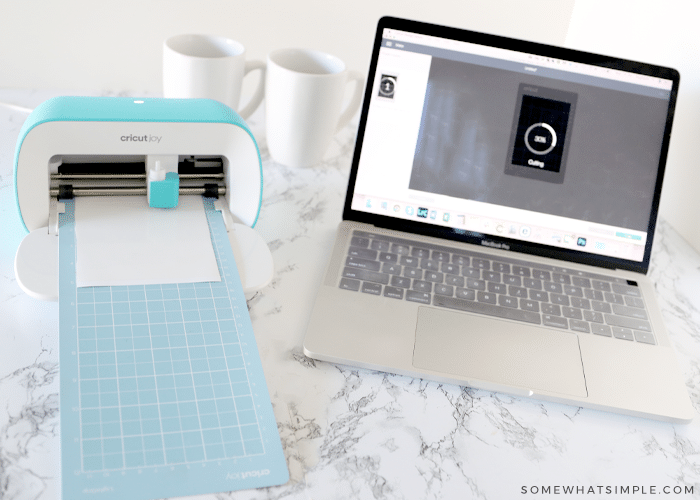
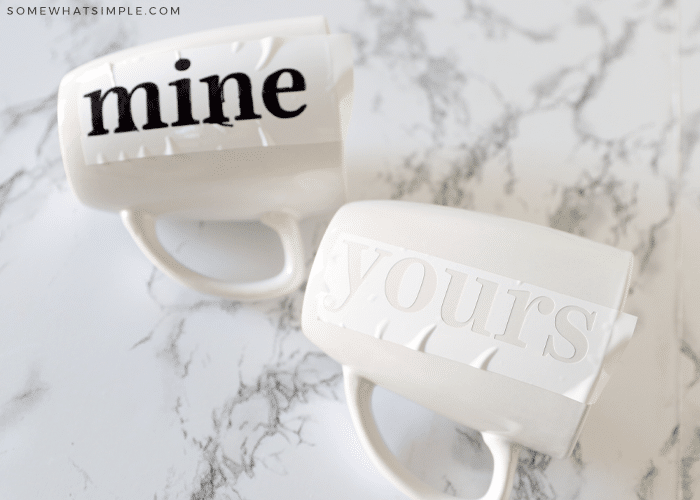
Create your stencil. Open up Cricut Design Space and type out or create a design you love. Cut out your design on some vinyl, then weed the design by pulling out the inside cuts. You’ll want to keep the negative surround to make a stencil. If you have small design elements, use some transfer tape to ensure your stencil stays in one piece.
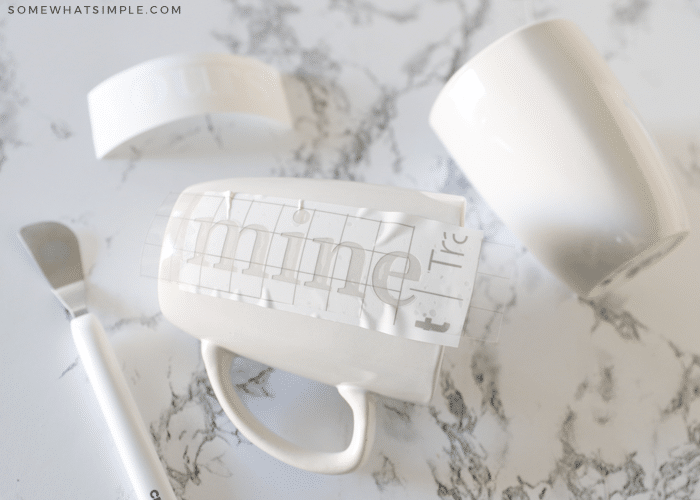
Apply the stencil to the mug. Press firmly around each edge to make sure your Sharpie ink doesn’t bleed under the stencil.
Color in your stencil. Get your Sharpie pen started as the directions read. Once your ink is flowing, trace your stencil and fill in every part of your design. The ink flows very quickly, so be prepared for it to come out fast. It also starts to dry very quickly, so be quick to wipe up and drips or mistakes with a q-tip or napkin.
Peel your stencil off. You will want to peel the vinyl stencil off before the ink sets too long. Waiting too long may cause the stencil to peel some of the ink off with it.
Bake your mug. Place your mug in the center of a baking sheet, then put the baking sheet in the center of a cool oven. You want to heat your mug up with the oven so that it doesn’t crack. Set your oven to 450F. Once at 450F, set the timer for 30 minutes.
Cool down. Turn the oven off after 30 minutes and allow the Sharpie mug to slowly cool in the oven. Do not touch your mug until the oven is completely cooled down.
Let it set. Once your Sharpie mugs have cooled, let them sit on the counter for 24 hours before exposing them to moisture.
Some of the tutorials for Sharpie mugs I’ve seen that are similar to this one say that the mugs are dishwasher safe, but this will depend on the type of ceramic mug you purchase. I’ve had some that come out of the wash looking fine and others that start to fade quite quickly.
Have fun making Sharpie mugs for everyone on your list!
When I first saw this project my first thought was “but I write like a 1st Grader…” but I love the vinyl method. I’m excited to give this one a try!!
~Cheryl
http://snaps-of-ginger.blogspot.com/
Isn’t it great?! Thanks for stopping by!
So clever to use the vinyl as a stencil!
Are these just regular sharpies that you use?
Trish:
Yes, I literally just grabbed a random Sharpie from our pen holder. The key seemed to be the bake time and temperature to make it dishwasher safe.
Amy @ Delineate Your Dwelling
That is great! Trying it soon,thanks!
This is awesome! So how do you print the vinyl stuff?
I have a Silhouette printer, Cassie. But you could also use stickers to get a similar kind of look.
I love these! Super cute!
This is so amazing!! What a brilliant idea and they will make such wonderful gifts!!
How does the design hold up after washing them?
Hi! I just followed (generally) your instructions and so-far so-good! I was wondering though if it is ok to use these sharpie mugs in the microwave… Have you tried it? Thanks for the post!
These are so cute! I want to try them with my 9 yr. old daughter. They will make great gifts, packed with little treats, teas, cocoa. I think we’ll try doing it with color Sharpies. She has a entire set and will love to make her own art. Definitely going to pin, FB, and Tweet this awesome project! Thanks for sharing.
I did these for gifts last Christmas. The designs would scrape off with my fingernail if I scratched at it. They also pretty much washed off after a few uses. I used nail polish remover to completely remove the half washed designs and did them all over again with a Sharpie paint pen, per someone’s suggestion. It held up better, but now a year later, the designs are rubbed off again. Either this project doesn’t like people with the name Brenda, or it just doesn’t work. Which is a big bummer, cause they look so awesome!
After baking the mugs, is the Sharpie permanent? Can I wash it afterwards and not have the marker come off? Thank You.
I don’t have oven can I bake it on atove top or microwave ? Does it work on plastic ?
Unfortunately this only works in the oven. 🙁